Workshops
Think outside the wrapper and learn how to make beautiful and functional tuxedo-style wrappers that can be used to enclose prints, books, photographs, or drawings.
There are no available registration dates at this time.
SOLD OUT! Email [email protected] to be placed on waitlist.
Note: This workshop will be held in a live, online format utilizing the Zoom platform.
Class meets on Saturday afternoon, Apr 15 from 1-4pm ET.
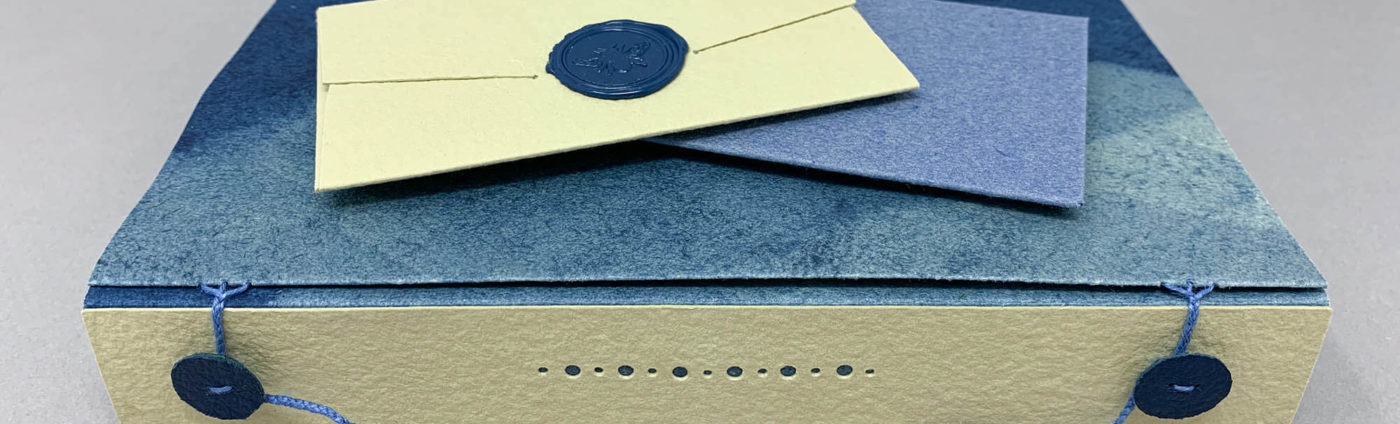
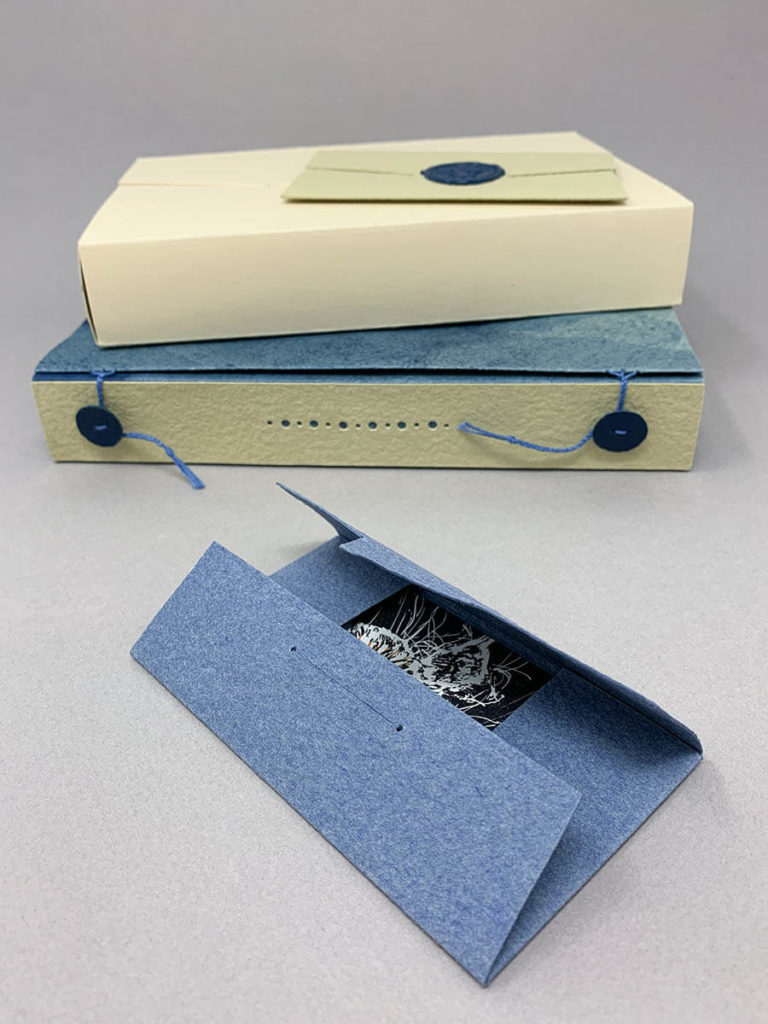
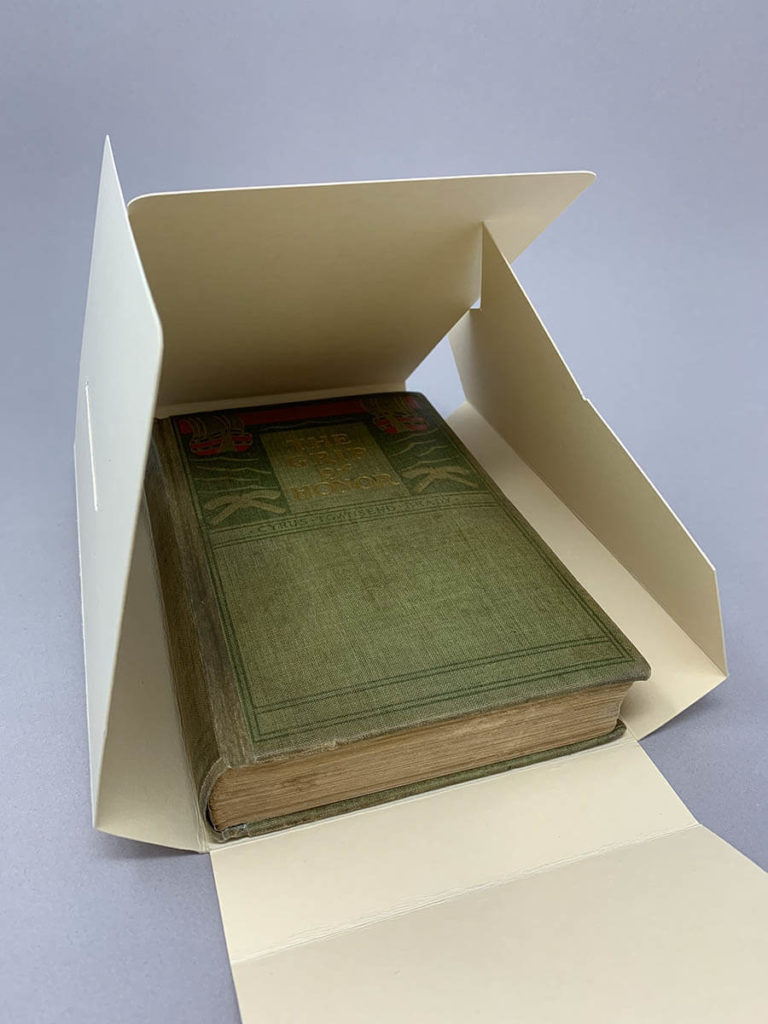
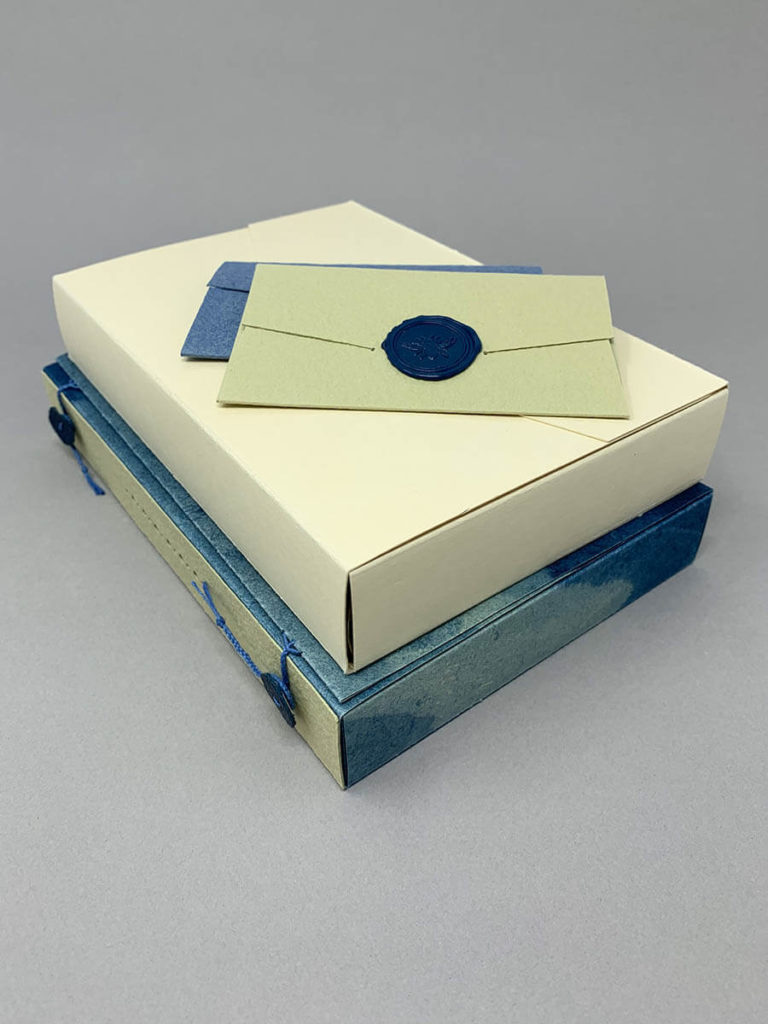
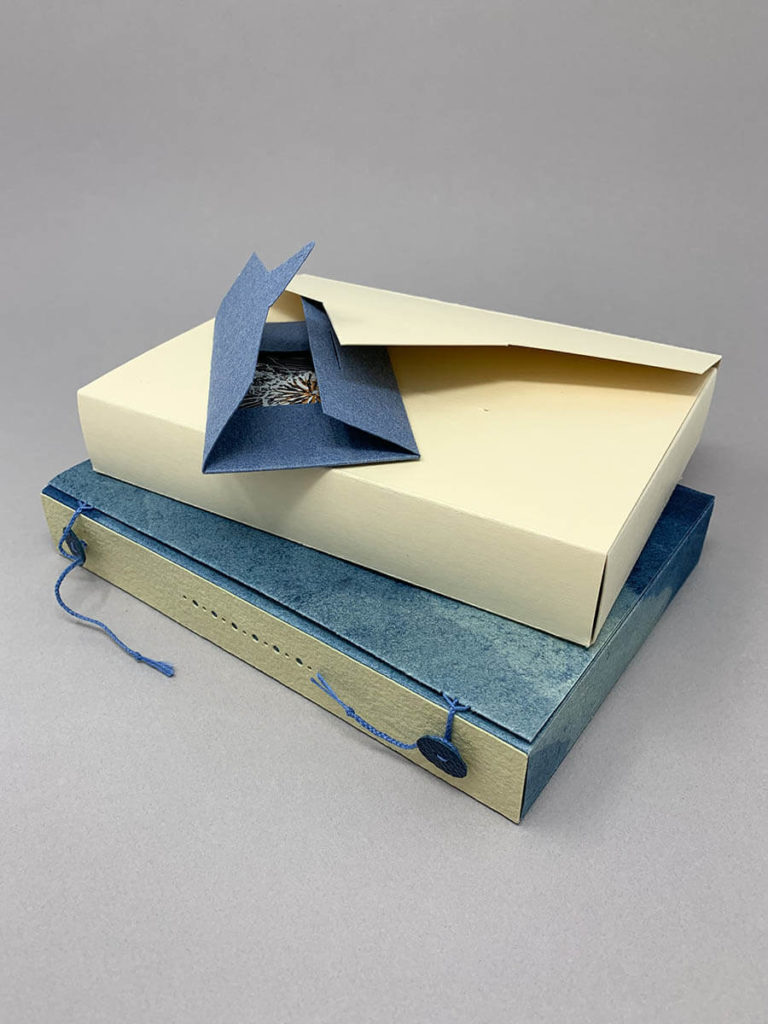
The four-flap wrapper is a staple of book preservation practices. It offers protection to worn and damaged books using few materials at a relatively low cost. The “tuxedo” wrapper, as it is also known, can be overlooked as an accessible enclosure — but has a great deal of artistic potential, especially for prints, books, photographs, and drawings.
In this online workshop, students will follow along with a live demo to make a tuxedo-style wrapper, complete with a self-locking flap. In the second part of the class, we’ll also look at how to make:
- a flat, envelope-like wrapper,
- a wrapper closing mechanism made with buttons and braided thread,
- and, we’ll cover the use of cutting and layering as a way to introduce decorative elements to the wrapper.
The class will dive into materials, adhesives, and tools. We’ll explore paper/card stock candidates for future projects, as well as other elements including threads, tapes, and cutting implements.
All levels are welcome.
Students will receive a kit containing:
- Pre-cut strips of 20-pt. card, in a light-yellow color (enough to make all three wrapper structures),
- Pieces of backed leather and backed cover-weight decorative papers (to use in the button-and-tie wrapper variation),
- Colored bookbinding thread (unwaxed),
- 10-pt. card stock in a dark gray color,
- Scrap board (for cutting the self-locking flaps),
- Some blotter paper and Reemay.
Students will need to source the following tools and adhesives:
- A roll of 1/2” 3M 415 Tape double-sided pressure-sensitive tape,
- Bone or Teflon folder (if possible, a bone folder with a pointy tip for scoring),
- Sharp scissors capable of small, neat cuts,
- 9mm Olfa knife OR X-Acto knife OR scalpel with #11 blades, for X-Acto or scalpel: replacement blades (10-12 recommended),
- Self-healing mat (approx. 12″ x 18″),
- Awl OR pin tool,
- Flat metal ruler (12″ or 18″),
- Metal triangle (suggested: 8″, 30/60/90 degrees),
- Scrap pieces of paper (a few sheets of printer paper
- Pencil and eraser
- PVA, and
- Glue brush
For the wrapper variations in particular, the instructor recommends the students source one (or more) book weight(s) (*As a book weight, students can use: a dense dictionary, a Tupperware container filled with marbles, a heavy and clean wooden cutting board, or a brick wrapped in paper…)
Optional tools (for students who already have these on hand, or for students who are looking to expand their tool-kit… but, by no means necessary to the class!):
- Paper or notebook for taking notes
- Dividers
- Japanese screw punch with a 1mm bit
Share This

Instructor: Suzanne Glémot
Suzanne Glémot is an artist and bookbinder living and working in Iowa City, IA. She earned her MFA from the University of Iowa Center for the Book, where she studied bookbinding and letterpress printing. Working in artist books, boxes, and prints, her pieces explore memory as it relates to language and place.